
Introduction
This guide demonstrates how to add parts and tools your guide page.
-
-
Click on the Edit button in the upper-right of the guide, just beneath the site header.
-
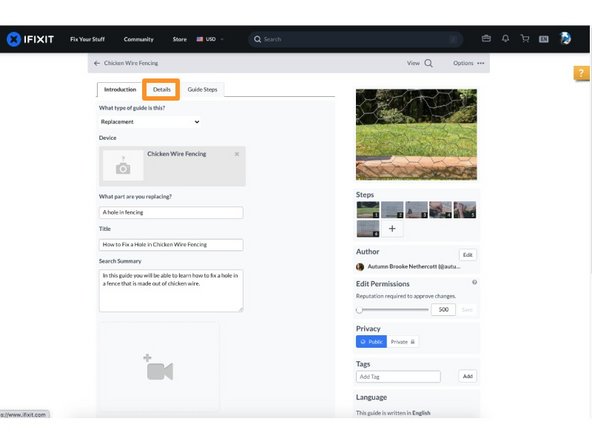
Click on the Details tab to add parts and/or tools.
-
-
-
Click on the Add a tool button to add tools to the guide.
-
Click on the Add a part button to add parts to the guide.
-
-
-
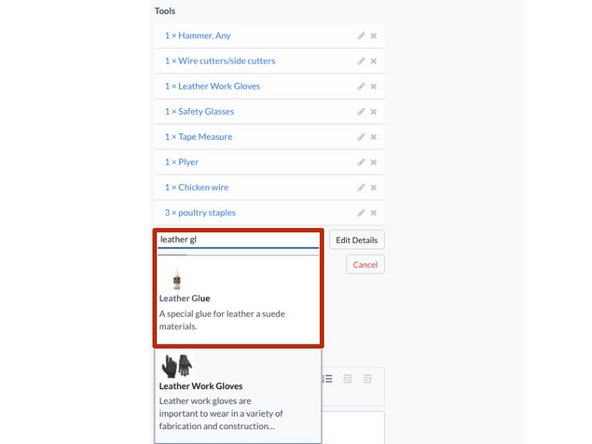
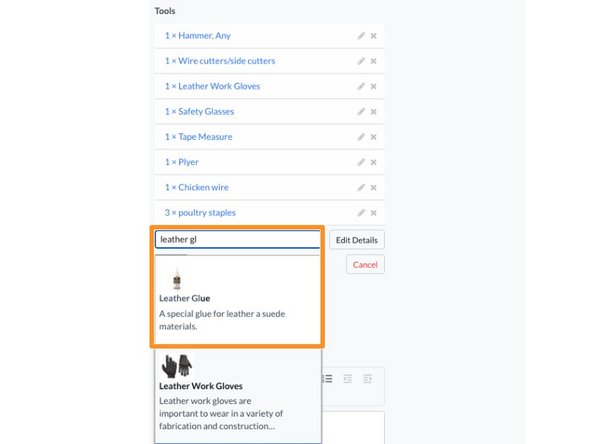
Begin typing in the name of the part or tool that you are adding.
-
If the part already exists on your site, it will appear in a drop-down menu. Select this part by clicking on it.
-
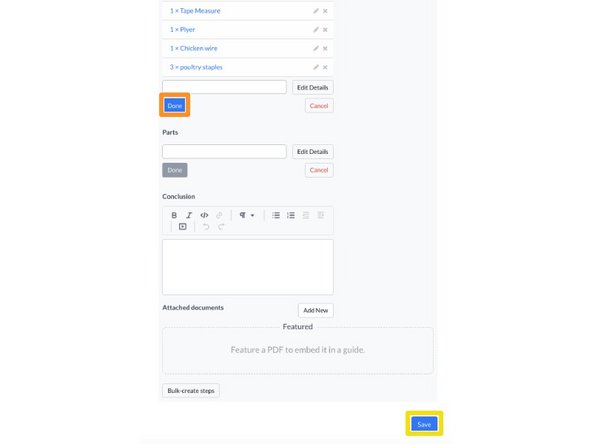
If you have no further information to add, click on the Done button.
-
Click Save.
-
-
-
If your part or tool does not exist in the system, click on the Add a tool or the Add a part button, accordingly.
-
In the text field, type in the name of the part or tool that you are adding.
-
-
-
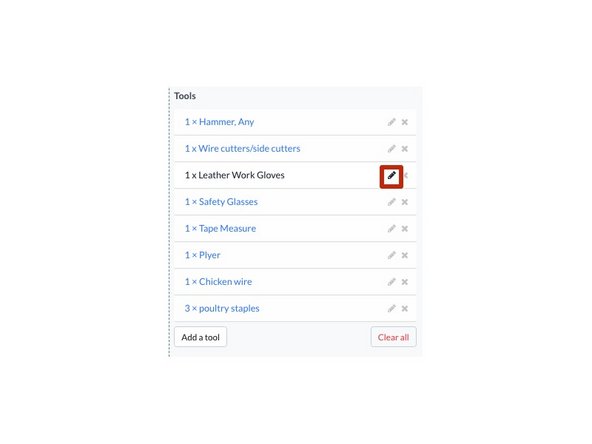
If you would like to add additional details about the part or tool, click on the pen to the right of the tool or item name.
-
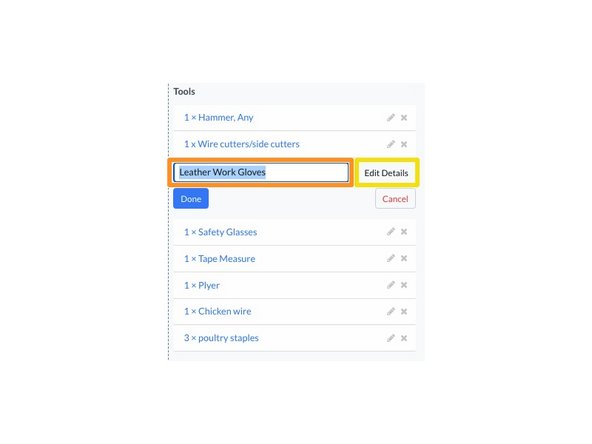
From here you can edit the part or tool.
-
Click Edit Details to further edit the chosen part or tool.
-
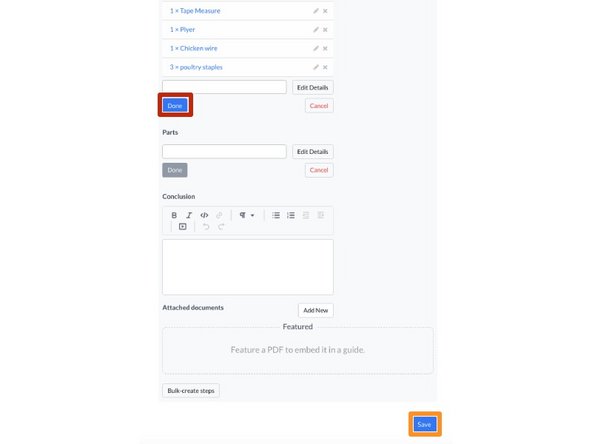
Here you can add in the Type, Quantity and any additional Notes about the part or tool. Enter in a brief summary or an optional product link.
-


Cancel: I did not complete this guide.
One other person completed this guide.


2 Comments
Hiya. Is there no way to view the tools and parts that have been created and create a parts and tools list outside of a guide? I would like to create a parts library in advance to make it quicker when people start making guides. Thank you.
Hey, Joshua! You can find a complete list of tools and parts on your Dozuki site by selecting your name at the top right of the page and navigating to the Manage interface. Once there, select Timeline –> Wikis –> Item.
Once an item is created, it’s added to your tools and parts library. When you start typing the name of the item in the Tools or Parts section seen in step 3, it will appear in the drop down menu. Please note that it can sometimes take a minute or two for the item to index and appear in that drop down menu immediately after the item page is created.