Introduction
This guide demonstrates how to create a guide page.
Video Overview
-
-
From the main iFixit home page, click on either:
-
The Community dropdown menu, then click on Get Involved.
-
Click on the Contribute tab.
-
Click on Create a new repair guide.
-
-
-
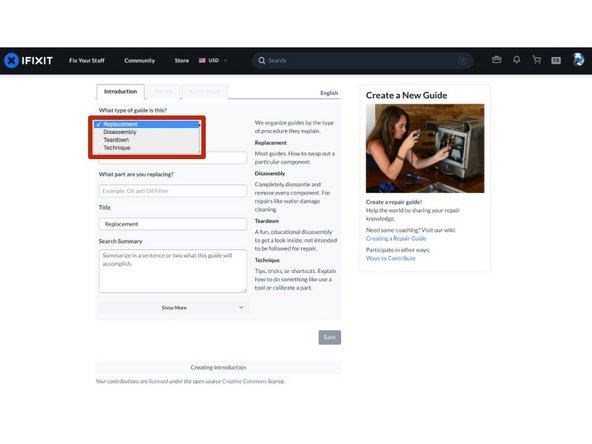
Select which type of guide you're creating:
-
Replacement: Most guides. How to swap out a particular component.
-
Disassembly: Completely dismantle every component. For repairs like water damage cleaning.
-
Teardown: A fun, educational disassembly to get a look inside; not intended to be followed for repair.
-
Technique: Tips, trick, or shortcuts. Explain how to do something like use a tool or calibrate a part.
-
-
-
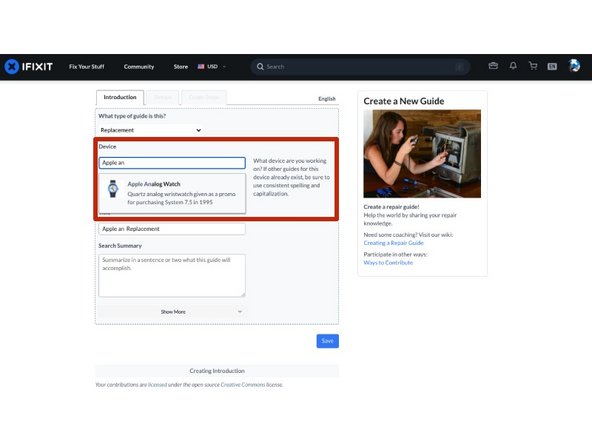
Now that the type of guide is selected, you can proceed with the rest of the details.
-
Start typing the name of the device you're writing about in the Device field. If the category page for that item already exits, it will autofill the name.
-
If you would like to add other information at this time, such as an introduction or flags, click Show More.
-
When finished adding information, click Save.
-
-
-
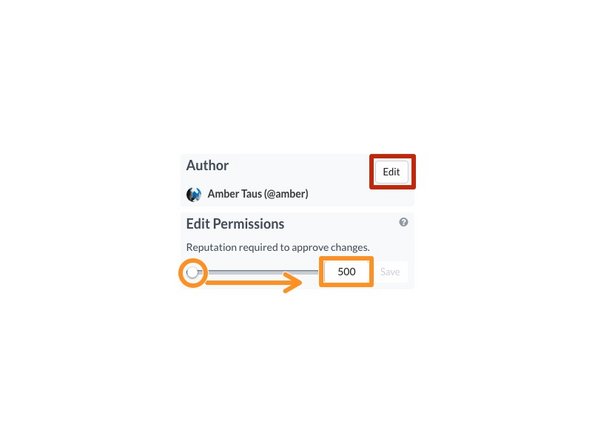
After a guide is saved, the menu on the right of the Introductions page will appear. Here you can set parameters for who can see, interact with, and reference your guide.
-
Click Edit to the right of "Author" to change the displayed author. This is helpful if you're working with a group and you'd like them to hold a high level of control over the guide.
-
The Permissions setting dictates how much reputation another user needs to have to edit your guide without it needed to be approved in that Patrol log. The default amount is 500. You can slide the button or type in the amount you prefer. The highest threshold is ∞, which will exclude all community members (aside from Admin and Authors.)
-
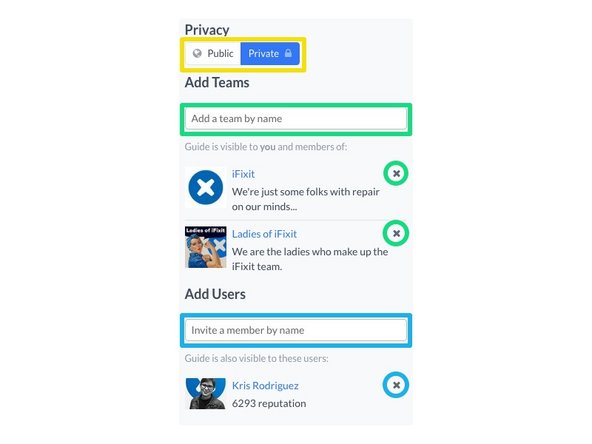
Here you can toggle the blue Privacy setting from Private (the default setting where only you, your chosen audience (see step below)) to Public (all of iFixit can benefit from your amazing repair guide.)
-
Select a Team of members to be able to view and edit your guide without sending it patrol. Any teams you've already joined will be automatically added here. You may also manually choose others. Click the X to remove any team from this list.
-
Search for the username of a specific User you'd like to help you with your guide. Click the X to remove any user from this list.
-
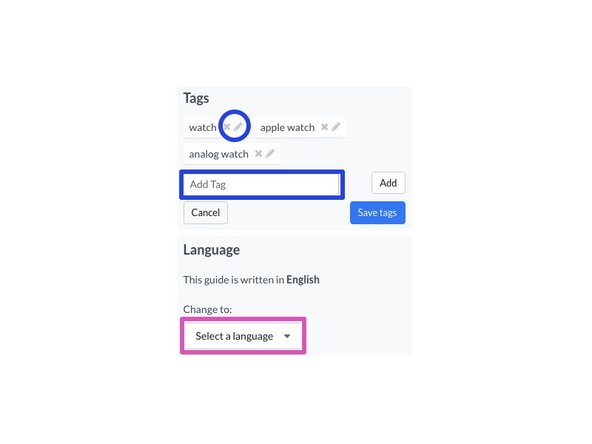
Add Tags to your guide so you can easily refer to them within any Wiki you may write. This is especially useful when writing a Troubleshooting wiki. Learn more about Wikis here.
-
Our site supports a hand full of different languages (and our amazing community is always helping us to add more!) If you happen to be browsing in one language and then write your guide in a different language, you can fix that here.
-
-
-
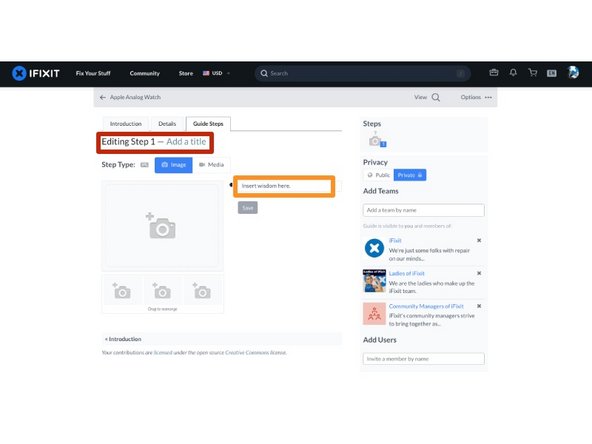
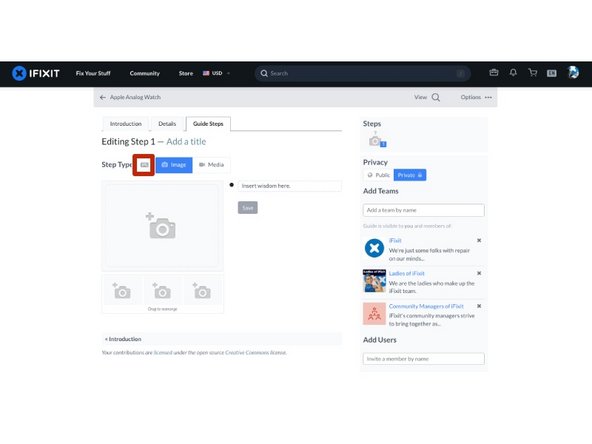
Click on the Add a Title text to enter a title for your first step.
-
Click on the Insert wisdom here text to enter your first bullet point text instructions.
-
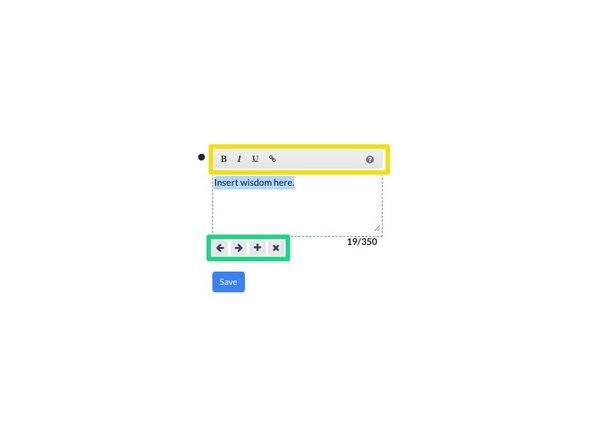
Use the formatting toolbar at the top of the text editing box to format your text or add links.
-
Use the arrows below the text box to indent your bullet. Use the + icon to create a new bullet and the X icon to delete the bullet.
-
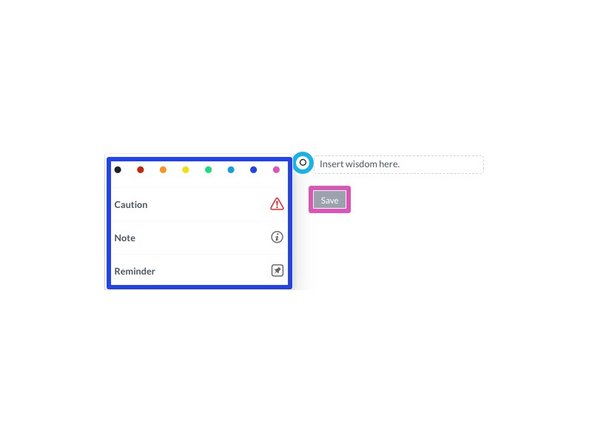
To change the color or icon for the bullet, click on the bullet icon.
-
Select from the color/icon menu to change your bullet point.
-
Click Save to create your first step!
-
-
-
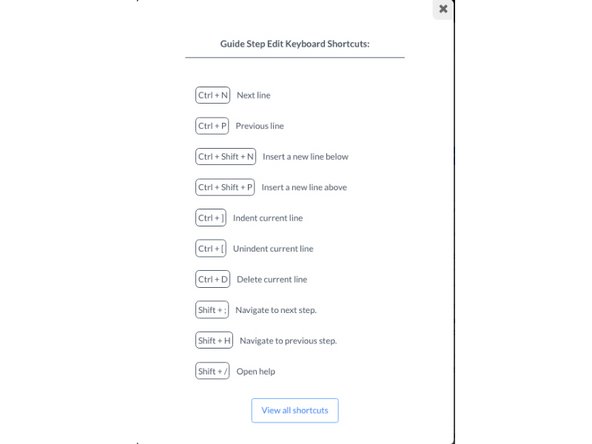
To open a Keyboard Shortcuts pop-up window, click on the keyboard icon at the top of the guide.
-
Return: Next bullet or insert new bullet.
-
Shift + Return: Previous Bullet or Insert Bullet Above.
-
Ctrl + ]: Indent bullet.
-
Ctrl + [: Unindent bullet.
-
Ctrl + D: Delete bullet.
-
-
-
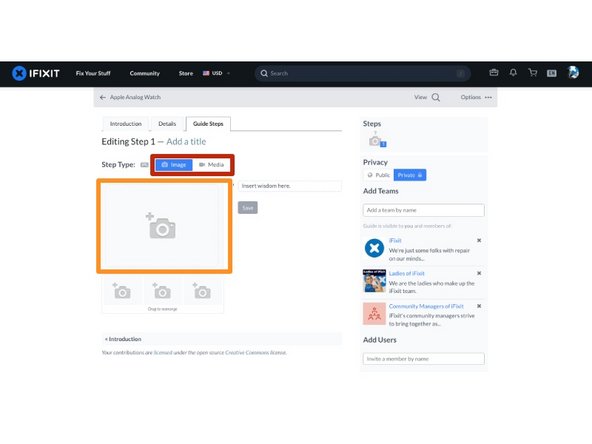
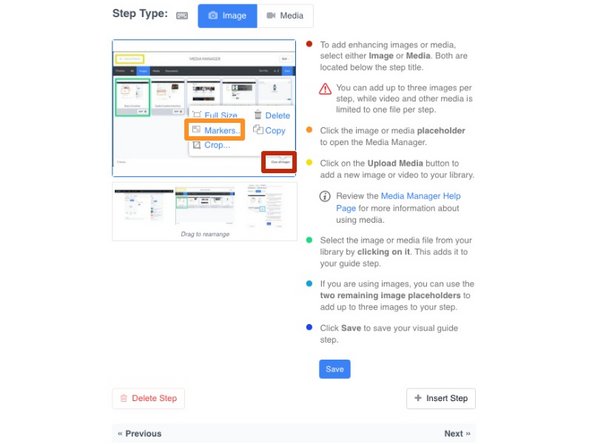
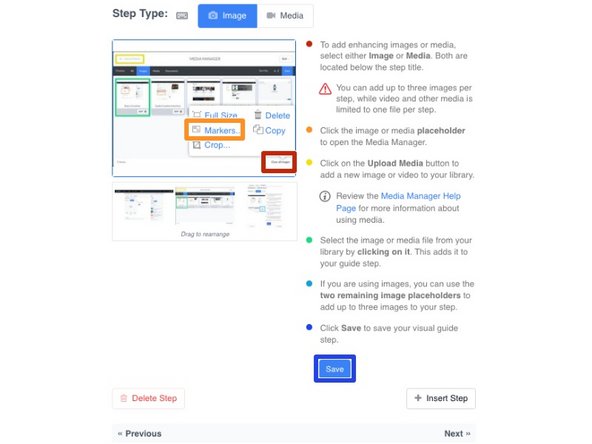
To add enhancing images or media, select either Image or Media. Both are located below the step title.
-
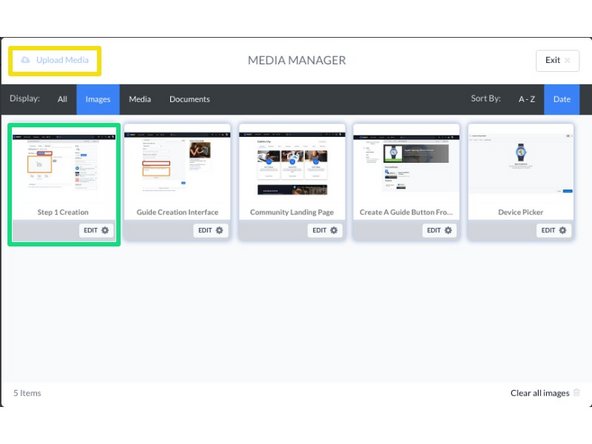
Click the image or media placeholder to open the Media Manager.
-
Click on the Upload Media button to add a new image or video to your library.
-
Select the image or media file from your library by clicking on it. This adds it to your guide step.
-
If you are using images, you can use the two remaining image placeholders to add up to three images to your step.
-
Click Save to save your visual guide step.
-
-
-
Move your curser over your new guide step image, then click on the Edit button in the bottom-right corner.
-
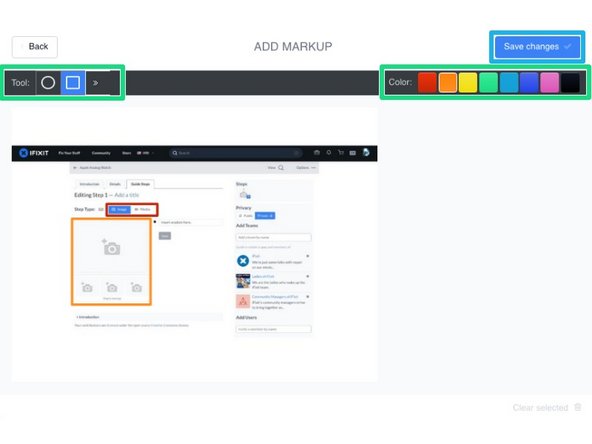
To open the Markup Window, select the Markers option from the menu.
-
Use the Tool menu in the top-left of the Markup Window to select a shape, line or arrow marker.
-
Click the image where you want to place the marker and adjust the size, shape, and orientation as needed.
-
Use the Color menu in the top-right of the Markup Window to select a color for your new marker.
-
Once you have created all of the markers, click on the Save Changes button in the very top-right corner of the Markup Window.
-
View your new image with the markup and click Save to save it to your guide step.
-
-
-
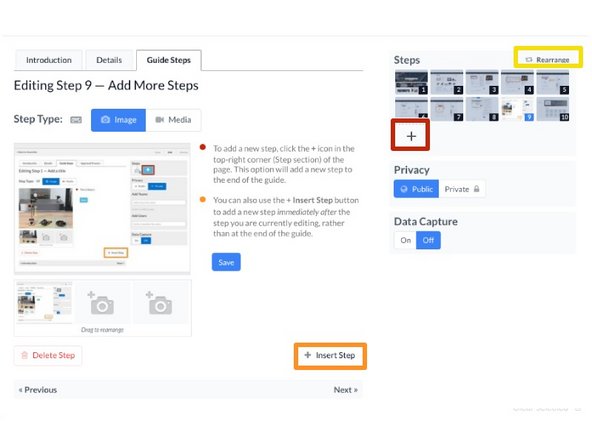
To add a new step, click the + icon in the top-right corner (Step section) of the page. This option will add a new step to the end of the guide.
-
You can also use the + Insert Step button to add a new step immediately after the step you are currently editing, rather than at the end of the guide.
-
If you want to change the order of the steps, click on Rearrange in the top left corner and click-and-drag the steps in the new order.
-
-
-
Review the '"Parts of a Guide Page" to add further detail to your guide.
-
Use the Help Guides to review specific topics, including:
-


Cancel: I did not complete this guide.
One other person completed this guide.