Introduction
This guide demonstrates how to construct our standard sized product shipping containers.
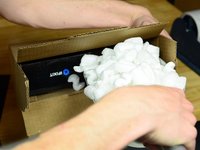
No special skills are needed to properly construct shipping boxes: however, product appearance and box quality are important for the over presentation to customers.
Here we will walk through how to safely and effective build a cardboard box that best ensures the product will be protected and the customer will appreciate the "out of the box" experience.
What you need
-
-
Press the creased edges along the longer sides of the box.
-
Locate the two open ends of the box.
-
At each end there are two small flaps attached to the narrow sides of the box.
-
Press these flaps towards the inside of the box until they are perpendicular.
-
On the side where you folded in the two smaller flaps, locate the long and narrow flap that is flat along the outer edge.
-
Locate the part of the flap with a crease and fold the top portion with the crease inwards until it is perpendicular.
-
Fold the entire flap inwards until it is flush with the top of the box.
-
Fold down the rounded rectangular flap that is attached to the other flap and insert it into the slit on the side of the box.
-
-
-
Apply a single, straight line of tape around the box.
-
Be sure to go fully around the box with the tape.
-