Introduction
This guide demonstrates how to select the appropriate camera equipment for taking guide photos.
High quality photographs make your how-to guides stand out, and they enable your readers to follow procedures more easily. This guide walks you through selecting the right camera equipment to create high quality guide images with a basic point-and-shoot camera.
-
-
Of course, the camera is the most important piece of hardware for taking photographs. Any point-and-shoot camera with at least 6 megapixels captures images with sufficient resolution.
-
-
-
Nearly every digital camera manufactured today is boxed up already set on an Auto function. Any camera received in such a setting should be immediately switched off of Auto. But, you ask, to which setting?
-
Aperture priority (denoted by an A or Av, depending on your camera's manufacturer) provides the best workflow when shooting photographs for guides. Additionally, you should set the ISO to the lowest possible value.
-
If your camera does not have an aperture priority mode, use its pre-programmed macro mode (usually denoted by a flower icon).
-
-
-
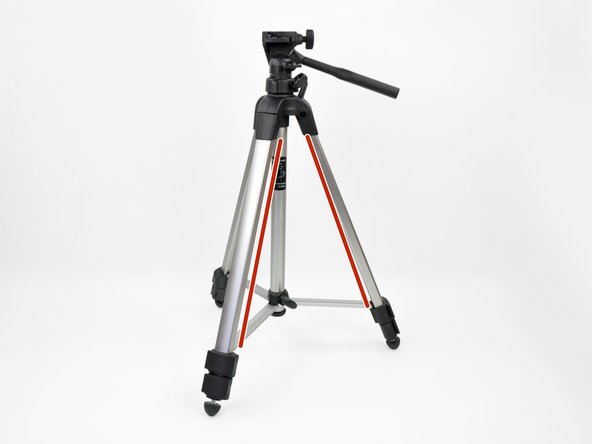
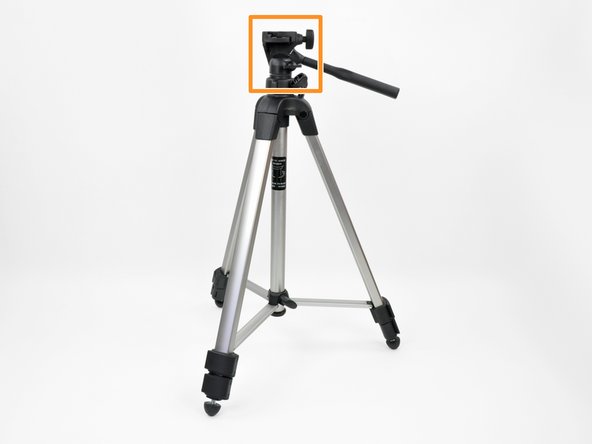
Every hand-held camera is prone to shakes and vibrations that cause blurry photos. To keep images sharp, use a tripod.
-
Selecting the right tripod ultimately boils down to how you plan to use your camera.
-
Most of the tripod's height should come from its legs, rather than the center column. Raising the center column makes the tripod less sturdy and should only be used for quick, temporary height adjustments.
-
If all of your photos are shot with the camera sitting perfectly horizontal, then a standard 3-way panning head is more than adequate. If your photography requires funky angles, look into a ball head-type tripod.
-
-
-
When it comes to cameras, even the slightest nudge can take a perfect composition and turn it into a blurry mess. Even pressing the shutter button can cause the camera to shake. To keep yourself from jostling the equipment, use a remote shutter release or your camera's self-timer.
-
Timer functions are also useful when you work alone and need both of your hands in the shot.
-
-
-
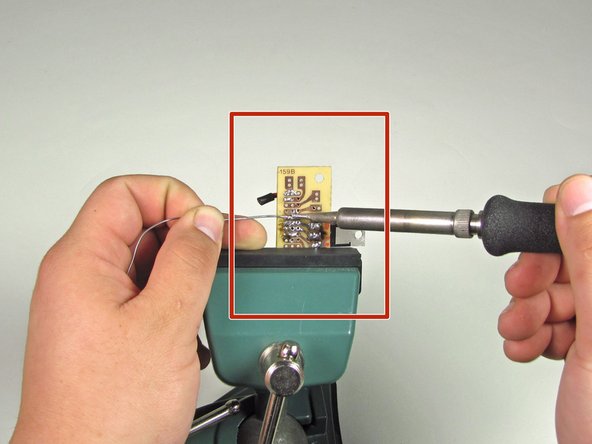
Even with inexpensive equipment, you can take high quality photographs that make your guides stand out.
-
This soldering picture was taken with the camera setup shown. All of the hardware together costs less than $200, and the resulting images look great!
-